
Ko se po temeljitem čiščenju začne vračati pravi videz stare pipe.
Uvod
Po večdnevnem globinskem čiščenju, sušenju in pripravi kurišč je bil čas za del obnove, ki ga večina opazi najprej – obnovo zunanjosti pipe.
Če notranje čiščenje poskrbi za zdravo osnovo, zunanja obnova briarju povrne toplino, barvo in sijaj, ustnikom pa ponovno zagotovi prijeten občutek med kajenjem.
Na tej stopnji se začne pokazati, koliko potenciala se je pravzaprav skrivalo pod plastmi umazanije in dolgoletne uporabe.
Obnova briarja
Po odstranitvi vseh nečistoč sem se posvetil briarju.
Vsako pipo sem najprej natančno pregledal, nato pa po potrebi popravil manjše nepravilnosti na robovih kurišča in odstranil drobne površinske poškodbe. Pri tem sem se izogibal pretiranemu brušenju, saj želim pri obnovi vedno ohraniti čim več originalnega materiala in značaja pipe.
Sledilo je nežno poliranje lesa, ki je ponovno razkrilo naravno strukturo briarja. Pri nekaterih pipah so se šele zdaj pokazali izraziti plameni, ptičje oči (birdseye) in drugi vzorci lesa, ki jih pred obnovo skoraj ni bilo mogoče opaziti.
Oživitev barve
Vsaka pipa je zahtevala nekoliko drugačen pristop.
Nekatere so po čiščenju ohranile skoraj ves originalni odtenek, druge pa so potrebovale osvežitev površine, da se je ponovno poudarila globina barve.
Posebej prijetno presenečenje je bila pipa Lorenzo, pri kateri so po obnovi ponovno zaživeli bogati rdečkasti odtenki, medtem ko je Royal Star razkrila precej izrazitejši vzorec briarja, kot je bilo mogoče sklepati po dražbenih fotografijah.
Obnova ustnikov
Medtem ko se briar obnavlja predvsem zaradi videza in zaščite lesa, je ustnik tisti del pipe, ki ga kadilec neposredno občuti pri vsakem kajenju. Prav zato mu pri obnovi namenim enako pozornost kot samemu briarju.
Vsak ustnik sem najprej temeljito očistil z alkoholom, s čimer sem odstranil ostanke katrana in drugih nečistoč iz dimnega kanala. Pri nekaterih ustnikih sem nato uporabil še čistilno kopel s praškom na osnovi aktivnega kisika, ki zmehča in odstrani oksidacijo vulkanita ter pripravi površino za nadaljnjo obdelavo.
Po čiščenju sem odstranil manjše površinske praske in po potrebi nežno pobrusil sledove zob. Ustnike sem nato postopoma spoliral s posebno polirno pasto za vulkanit, s čimer so ponovno dobili globok črn sijaj. Posebno pozornost sem namenil tudi naleganju ustnikov, saj mora biti spoj z vratom pipe natančen, tesen in brez zračnosti.
Posebno zanimivost je predstavljala rustificirana pipa brez oznake proizvajalca, katere ustnik je opremljen z aluminijastim vložkom (tenon). Ta zagotavlja natančen in trden spoj z vratom pipe, hkrati pa ostane skoraj popolnoma skrit v notranjosti. Tudi aluminijasti vložek sem previdno obnovil – z zelo finim brusnim papirjem sem odstranil površinsko oksidacijo, nato pa ga spoliral, da je ponovno dobil čist in urejen videz.
Ponovna sestava
Ko so bili briar, ustniki in kurišča pripravljeni, je sledila ponovna sestava vseh pip.
Šele v tem trenutku se prvič pokaže končna podoba obnove. Posamezni deli, ki so bili med delom obravnavani ločeno, ponovno tvorijo celoto in razkrijejo, koliko se je videz posamezne pipe spremenil od prihoda iz dražbe.
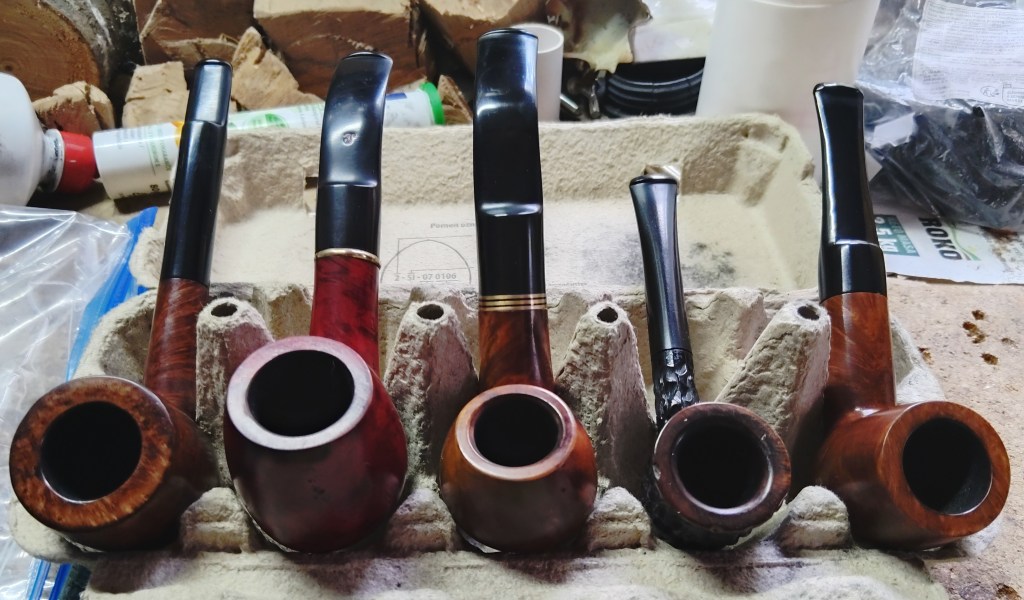
Slika 1. Prva skupinska fotografija sestavljenih pip po zaključeni obnovi briarja in ustnikov (manjka Danish Design, ker ni bila potrebna obnove).
Skoraj pripravljene na prvo kajenje
Na tej stopnji so bile vse pipe praktično pripravljene za uporabo. Manjkalo je le še končno fotografiranje in zadnji pregled, s katerim sem preveril, da je vsaka pipa pripravljena na nova leta uporabe.
Prav ta trenutek je vedno eden najbolj zadovoljivih pri obnovi – ko iz skupine zanemarjenih starih pip ponovno nastane zbirka, ki je pripravljena na svoj naslednji življenjski cikel.
Kaj sledi?
V zadnjem delu serije bom predstavil končne studijske fotografije vseh obnovljenih pip, primerjal pričakovanja z dejanskimi rezultati ter podal svojo končno oceno celotnega projekta. Katera pipa me je najbolj presenetila? Ali so se dražbene fotografije izkazale za zanesljive? In ali bi takšen komplet ponovno kupil?
Več informacij o pipah in dodatkih za njihovo uporabo je na Mosir Smoking Pipes: Facebook & Instagram & Etsy
🇬🇧 English version
From Auction to First Smoke – Part 4: Restoring the Exterior and the Stem
Where years of wear begin to disappear and the true character of each pipe starts to emerge.
Restoring the Exterior
After several days of deep cleaning, drying and preparing the tobacco chambers, it was finally time for the part of the restoration that most people notice first—the exterior.
While internal cleaning provides a healthy foundation, restoring the outside of the pipe brings the briar back to life, revealing its warmth, colour and natural beauty. At the same time, the stem regains the smooth finish and comfortable feel that every pipe smoker appreciates.
This is the stage where the true potential hidden beneath years of dirt and use finally begins to appear.
Restoring the Briar
With the internal work completed, my attention turned to the briar itself.
Each pipe was carefully inspected once again. Where necessary, I corrected minor imperfections around the bowl rim and removed small surface blemishes. Throughout the process, I deliberately avoided excessive sanding, as my goal is always to preserve as much of the original material and character of the pipe as possible.
The briar was then gently polished, gradually revealing its natural grain. Only at this stage did some pipes begin to display beautiful flame grain, birdseye and other patterns that had been almost impossible to appreciate before the restoration.
Reviving the Original Finish
Every pipe required a slightly different approach.
Some retained almost all of their original finish after cleaning, while others benefited from carefully refreshing the surface to restore the depth and richness of their colour.
One of the biggest surprises was the Lorenzo, whose rich reddish finish came back to life beautifully after restoration. The Royal Star, on the other hand, revealed a far more striking grain pattern than the auction photographs had suggested.
Restoring the Stems
While the briar is restored primarily for appearance and long-term protection, the stem is the part of the pipe with which the smoker is in constant contact. For that reason, I devote just as much attention to the stem as I do to the briar itself.
Each stem was first thoroughly cleaned with alcohol to remove tar and other residues from the airway. On some vulcanite stems, I also used an oxygen-based cleaning solution to soften and remove oxidation, preparing the surface for the next stages of restoration.
After cleaning, minor scratches were removed and any tooth marks were carefully sanded where necessary. The stems were then polished using a specialised vulcanite polishing compound until they regained their deep black gloss.
Special attention was also paid to the fit of every stem. A properly restored pipe should not only look good—it should fit together precisely, with a tight, airtight connection between the stem and the shank.
One particularly interesting feature was found on the rusticated pipe with no maker’s mark. Its stem is fitted with an aluminium tenon, providing a precise and durable connection while remaining almost completely hidden inside the pipe. The aluminium insert was also carefully restored by removing the surface oxidation with ultra-fine abrasive paper before being polished back to a clean finish.
Reassembly
Once the briar, stems and tobacco chambers were ready, the pipes could finally be reassembled.
This is always one of the most rewarding moments of any restoration. Components that have been treated separately finally come together again, revealing just how dramatically each pipe has changed since it first arrived from the auction.
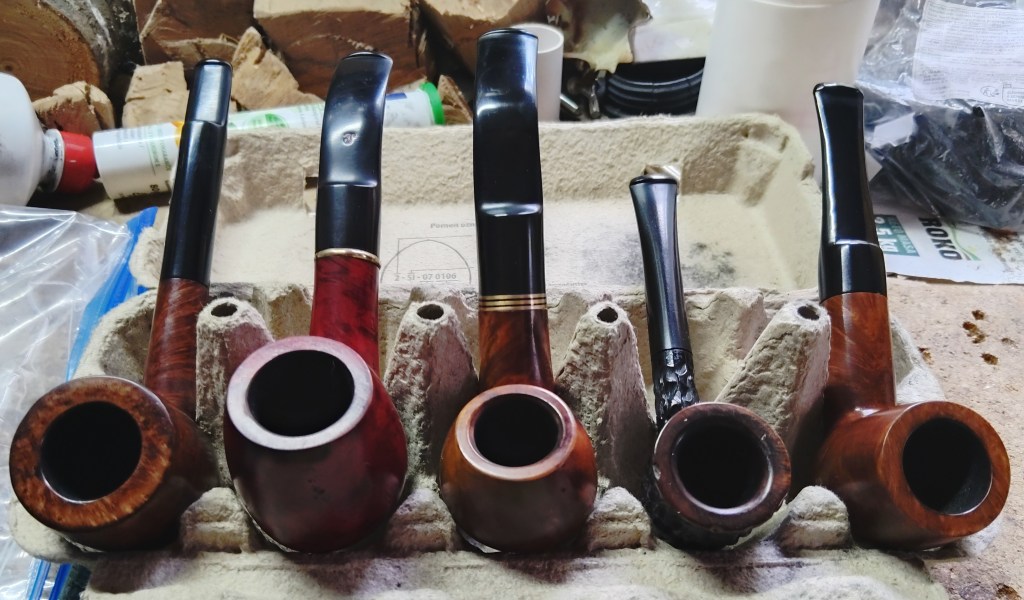
Figure 1. The first group photograph after the restoration of the briar and stems had been completed.
Almost Ready for Their First Smoke
At this stage, the pipes were practically ready to return to service.
All that remained was a final inspection and a proper photographic session to document the finished restoration before the pipes began the next chapter of their lives.
For me, this is always one of the most satisfying moments in the entire process—seeing a group of well-used estate pipes transformed into a collection ready to be enjoyed for many more years.
What Comes Next?
In the final article of this series, I will present the finished studio photographs of every restored pipe, compare my initial expectations with the final results, and share my overall thoughts on the project.
Which pipe exceeded my expectations? How accurate were the auction photographs? And, perhaps most importantly, would I buy a similar estate pipe lot again?
More info about pipes and other products for their use you can get at: Mosir Smoking Pipes – Facebook & Instagram & Etsy.
Discover more from Ko pipa zadiši... / When you smell the pipe...
Subscribe to get the latest posts sent to your email.

