
Ko dražbene fotografije zamenja prvi pogled na delovni mizi.
Uvod
Ko je paket iz Litve končno prispel, je napočil trenutek, ko so dražbene fotografije zamenjale dejanske pipe. Čeprav je prodajalec pripravil kakovostne fotografije, te nikoli ne razkrijejo vseh podrobnosti. Šele ko pipo primeš v roke, razstaviš in natančno pregledaš, lahko oceniš njeno pravo stanje.
V kupljenem kompletu je bilo šest pip različnih proizvajalcev in oblik. Na prvi pogled nobena ni kazala večjih mehanskih poškodb, kar je bil dober znak. Kljub temu sem vedel, da bo šele podrobnejši pregled pokazal, koliko dela bo dejansko potrebnega.
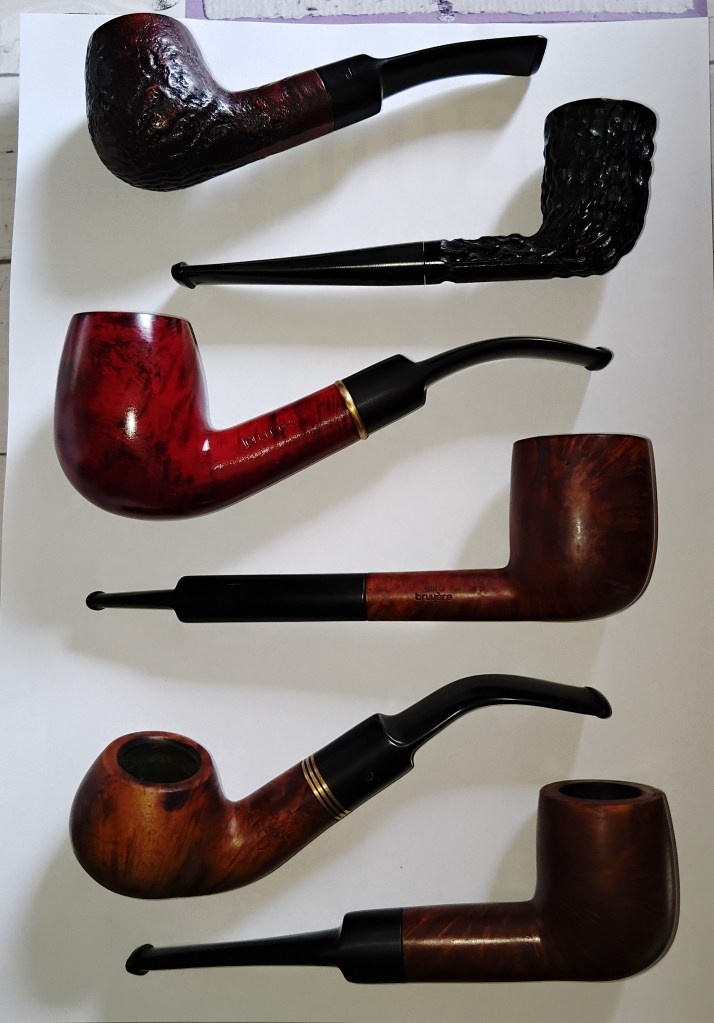
Slika 1. Šest pip po prihodu v delavnico, še pred začetkom obnove.
Prvi pregled
Vsako pipo pred začetkom obnove najprej temeljito pregledam. Ne zanima me le videz zunanjosti, temveč predvsem stanje briarja, rob kurišča, debelina sloja oglja (cake), dimni kanal ter ustnik.
Na tej stopnji preverim tudi:
- morebitne razpoke v kurišču,
- ožgane robove,
- pravilno naleganje ustnika in njegovo obrabo,
- poškodbe in obrabo dimnega kanala ,
- ter morebitne skrite poškodbe, ki na dražbenih fotografijah niso bile vidne.
Na moje zadovoljstvo nobena od pip ni skrivala večjih presenečenj. Vse so bile konstrukcijsko zdrave in primerne za obnovo.
Razstavljanje
Pred začetkom čiščenja vse pipe popolnoma razstavim. Ločeno obravnavam briar in ustnik, saj vsak material zahteva drugačen pristop.
Razstavljanje omogoča tudi natančnejši pregled dimnega kanala in spojev, ki jih pri sestavljeni pipi ni mogoče ustrezno očistiti.
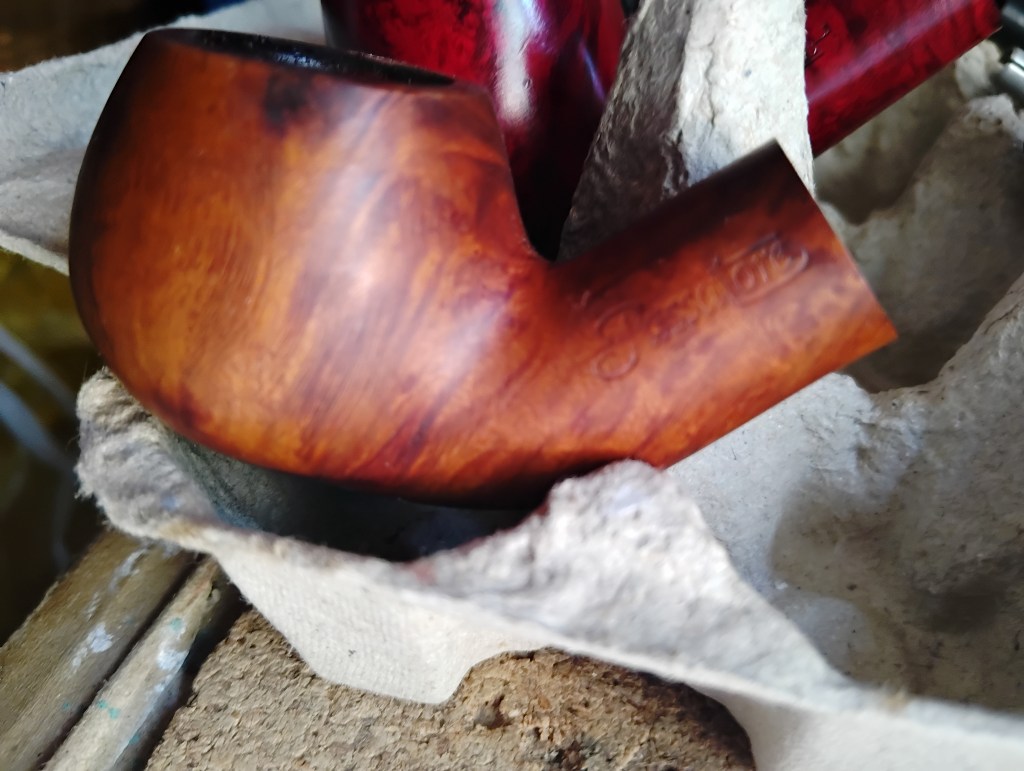
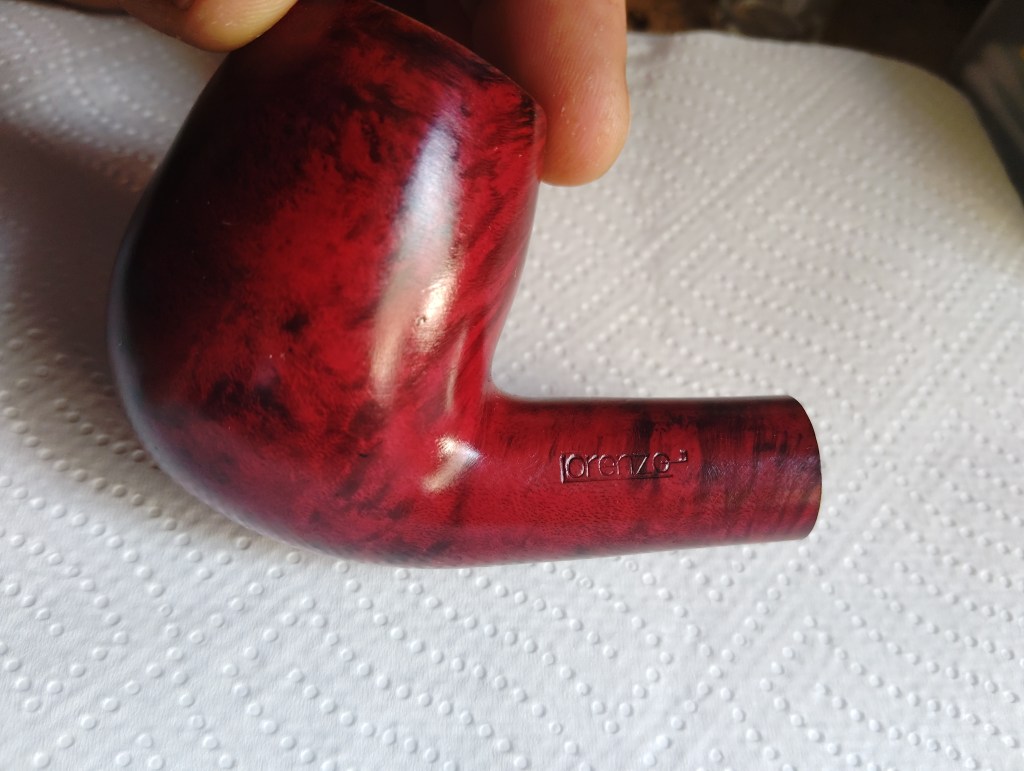
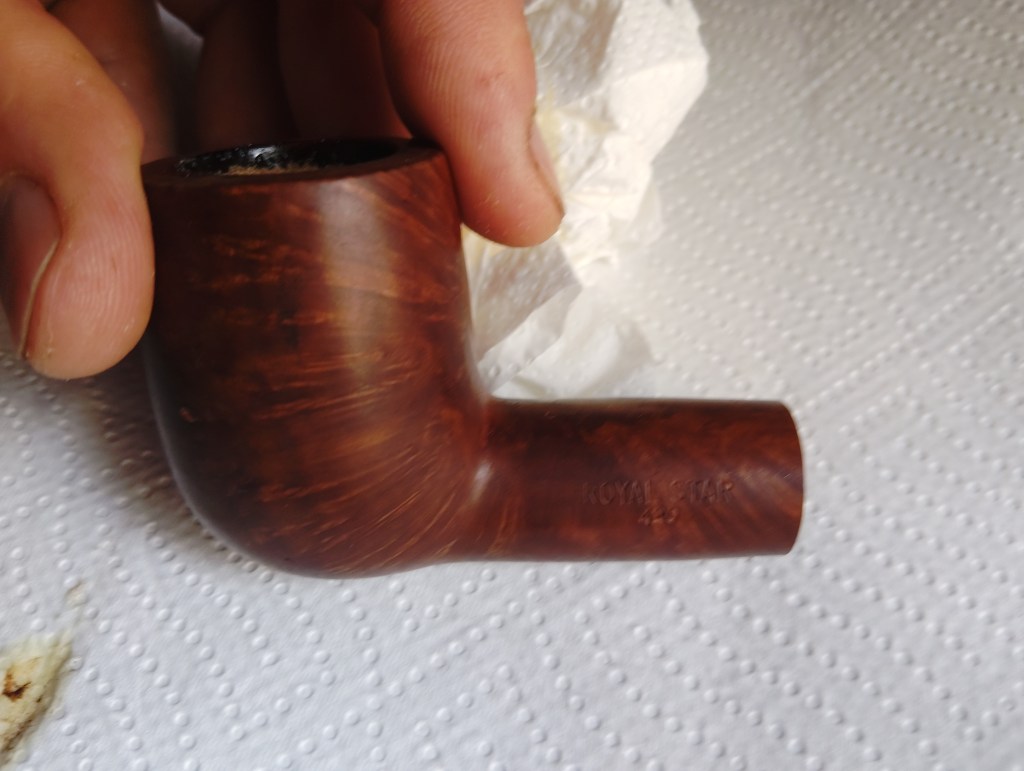
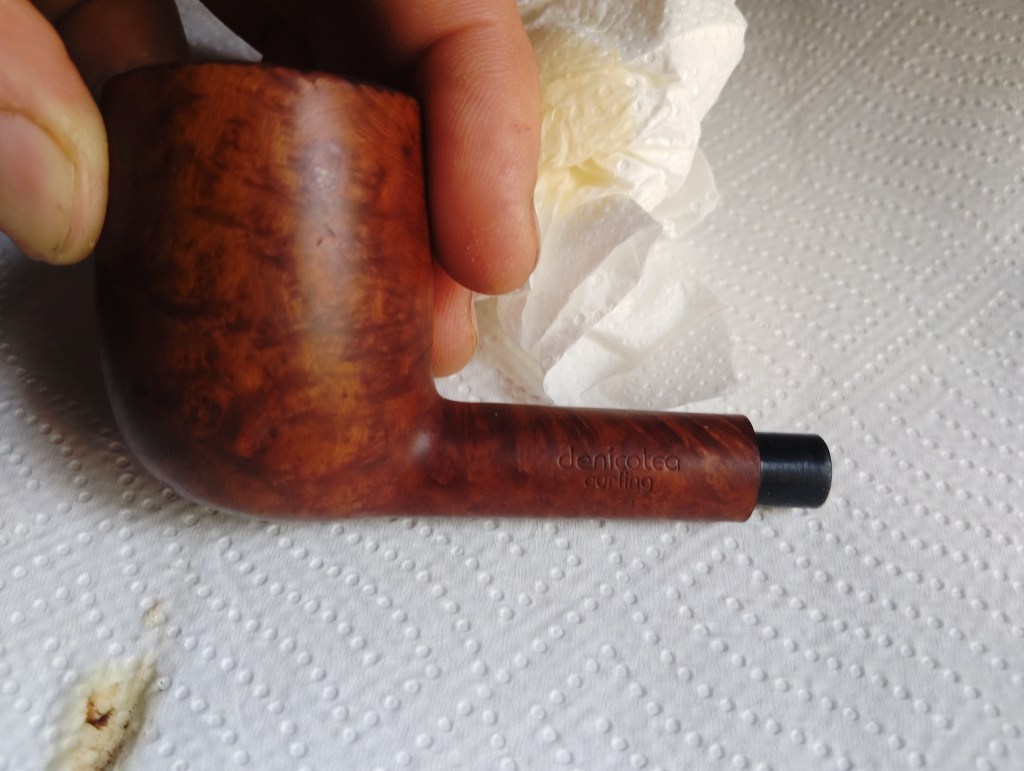
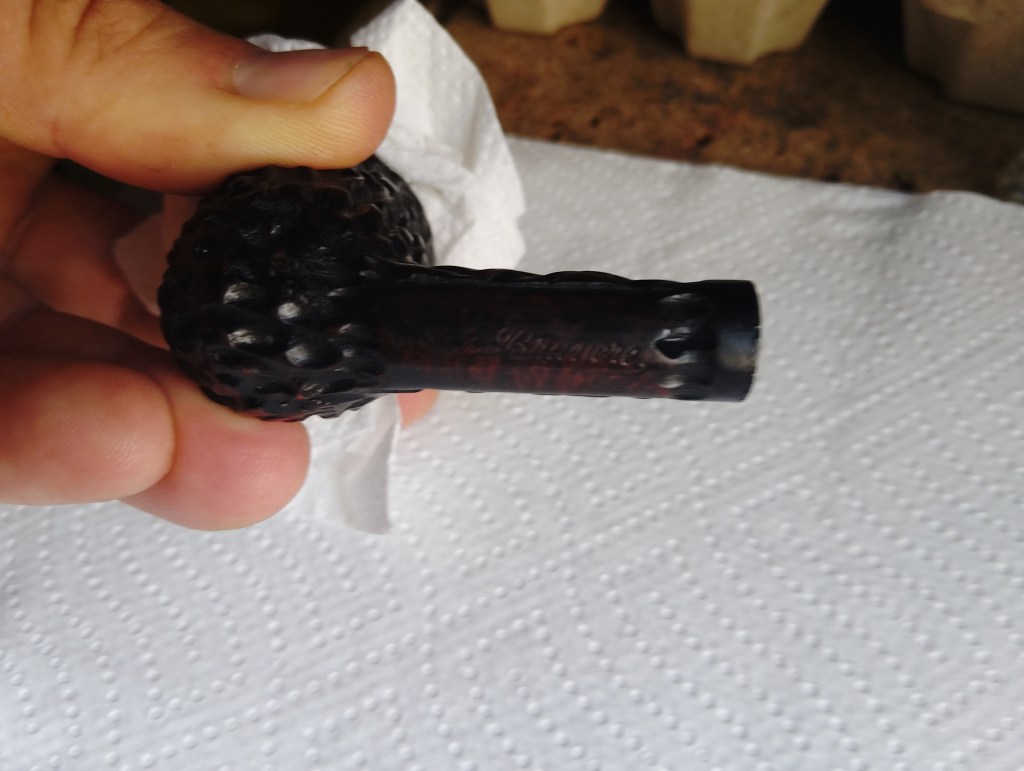
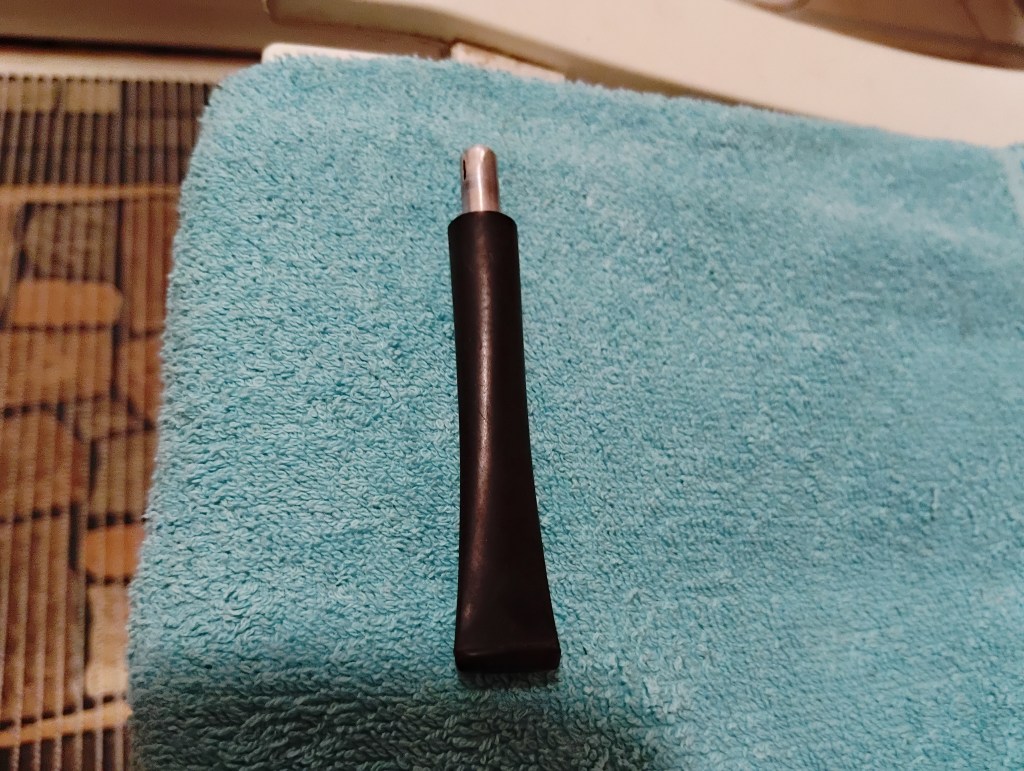
Slika 2. Razstavljene pipe pred začetkom posameznih restavratorskih postopkov (manjka Danish Design brez oznake proizvajalca, saj obnova ni bila potrebna) .
Mehansko čiščenje
Prvi praktični korak je odstranitev starega sloja oglja iz kurišča. Pomagam si z različnimi strgali glede na različno velikost bovle. Debelina tega sloja je bila pri posameznih pipah različna, vendar nobena ni kazala znakov pregrevanja ali razpok, kar je bila zelo dobra novica.
Po odstranitvi oglja sem temeljito očistil tudi dimne kanale in notranjost vratu pipe s pomočjo čistega alkohola. Šele tako je mogoče oceniti dejansko stanje lesa.
Prva opažanja
Čeprav sem imel po dražbenih fotografijah določena pričakovanja, me je nekaj pip prijetno presenetilo.
Passatore je bila pipa, ki je glede na fotografije potrebovala največ čiščenja in obnove. Debela plast oglja v kurišču ter močno uporabljena zunanjost sta nakazovali, da bo zahtevala največ dela, vendar se je po prvem čiščenju izkazalo, da je briar pod nečistočami zelo lepo ohranjen.
Lorenzo je po čiščenju razkrila čudovit finiš in živahne rdečkaste odtenke, ki na dražbenih fotografijah niso prišli do izraza.
Royal Star je pokazala lep vzorec briarja, ki ga na fotografijah prodajalca skoraj ni bilo mogoče opaziti.
Denicotea Curling me je poleg kakovostne izdelave presenetila tudi s svojim zanimivim sistemom snemljivega nastavka za ustnik. Takšna zasnova omogoča enostavno razstavljanje in čiščenje, hkrati pa predstavlja nekoliko drugačen pristop od običajnih klasičnih spojev med ustnikom in vratom pipe.
Tudi rustificirana pipa brez oznake proizvajalca je po odstranitvi večjih nečistoč ponovno razkrila izrazito teksturo površine. Prav rustikacija je bila eden od razlogov, da me je pipa pritegnila že na dražbi. Med razstavljanjem pa sem odkril še eno zanimivost – ustnik ima vgrajen aluminijast vložek (tenon), ki zagotavlja natančen in trden spoj z vratom pipe. Takšne rešitve danes srečamo redkeje, zato je bila to prijetna tehnična podrobnost.
Danish Design (brez oznake proizvajalca) pa je potrdila moja pričakovanja. Izkazalo se je, da gre za praktično novo, še neukajeno pipo, zato obsežnejša obnova ni bila potrebna. Po osnovnem pregledu in čiščenju je svoje mesto našla na polici z ostalimi pipami, kjer je počakala na prvo kajenje in se ne pojavlja več na fotografijah obnove.
Kaj sledi?
Ko je bil začetni pregled zaključen, se je lahko začela prava obnova. Naslednji koraki so vključevali temeljito čiščenje dimnih kanalov, odstranitev starega sloja oglja iz kurišča ter po potrebi previdno brušenje kurišča do zdravega briarja, kadar tega ni bilo mogoče doseči zgolj s posebnimi strgali. Sledilo je odstranjevanje ostankov vonja in okusa tobaka s pomočjo soli in alkohola, večdnevno sušenje ter postopna obnova briarja. Vzporedno je potekala tudi ločena obnova ustnikov.
V naslednjem delu serije bom podrobneje predstavil posamezne faze obnove – od čiščenja s soljo in alkoholom do zaščitnega premaza kurišča (bowl coating) in končne obdelave.
Več informacij o pipah in dodatkih za njihovo uporabo je na Mosir Smoking Pipes: Facebook & Instagram & Etsy
🇬🇧 English version
From Auction to First Smoke – Part 2: First Inspection and the Beginning of the Restoration
When auction photos give way to the real condition of the pipes
Introduction
When the parcel from Lithuania finally arrived, it was time to find out how accurately the auction photographs reflected reality.
No matter how good a seller’s photographs may be, they rarely tell the whole story. Small scratches, hidden wear, the condition of the chamber, or even the true colour of the briar only become apparent once a pipe is in your hands.
The estate pipes contained six pieces from different makers and covering a wide variety of shapes and finishes. At first glance, none showed any serious structural damage—a promising start. Even so, experience has taught me that the real assessment begins only after every pipe has been carefully inspected and taken apart.
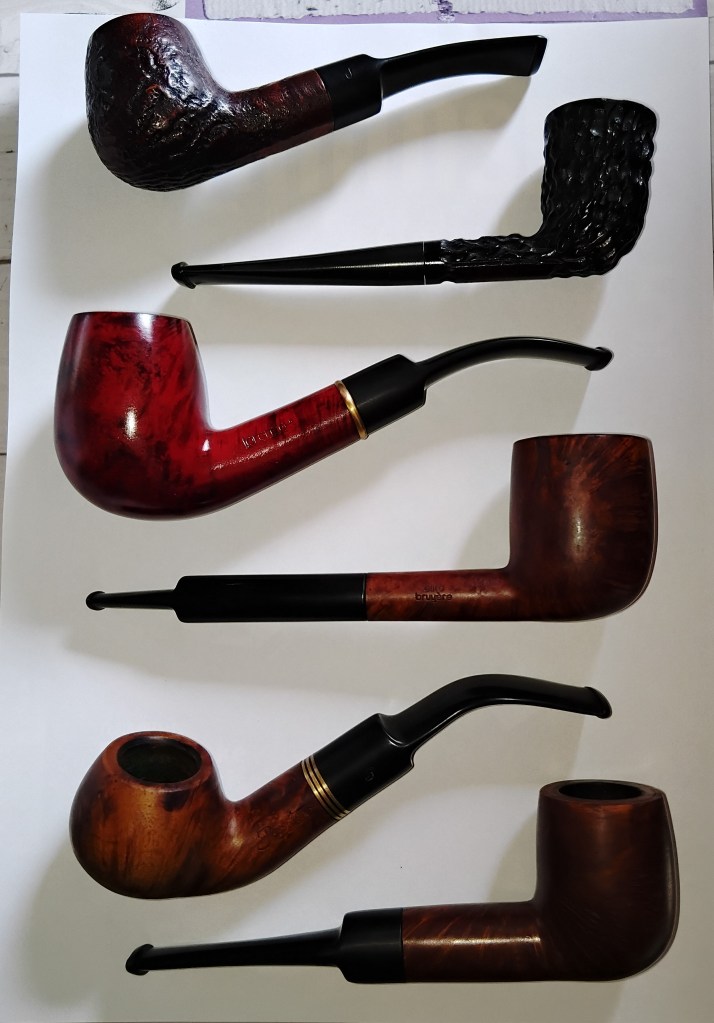
Figure 1. The six estate pipes upon arrival, before restoration began.
The First Inspection
Every restoration begins with a careful examination. Before reaching for any cleaning tools, I want to understand exactly what I am dealing with.
The overall appearance is only one small part of the inspection. More important are the condition of the briar itself, the bowl rim, the thickness of the cake, the airway, and the stem.
At this stage I also look for:
- cracks inside the chamber,
- burn damage around the bowl rim,
- stem wear and how well the stem fits the shank,
- wear or damage inside the airway,
- hidden defects that could not be seen in the auction listing.
Fortunately, this lot contained no unpleasant surprises. Every pipe proved to be structurally sound and well worth restoring.
Taking the Pipes Apart
Once the inspection is complete, every pipe is fully disassembled.
The stummel and the stem are always restored separately, as vulcanite, acrylic and briar each require their own restoration techniques.
Disassembly also allows the airway and mortise to be inspected and cleaned properly—areas that remain inaccessible while the pipe is assembled.
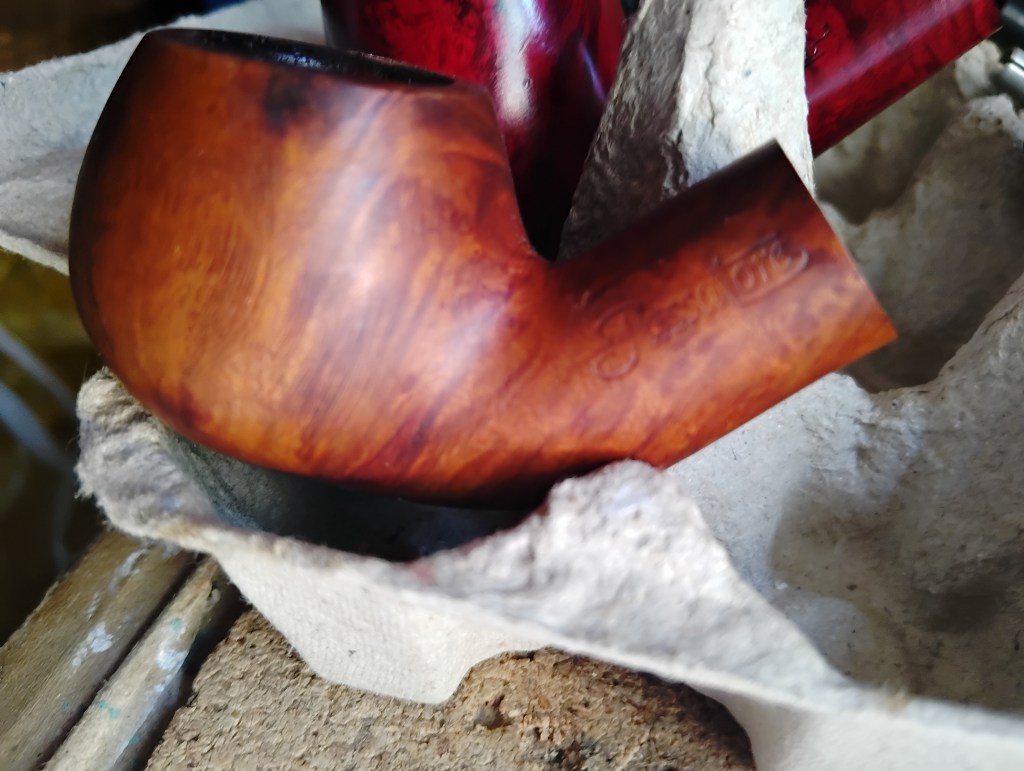
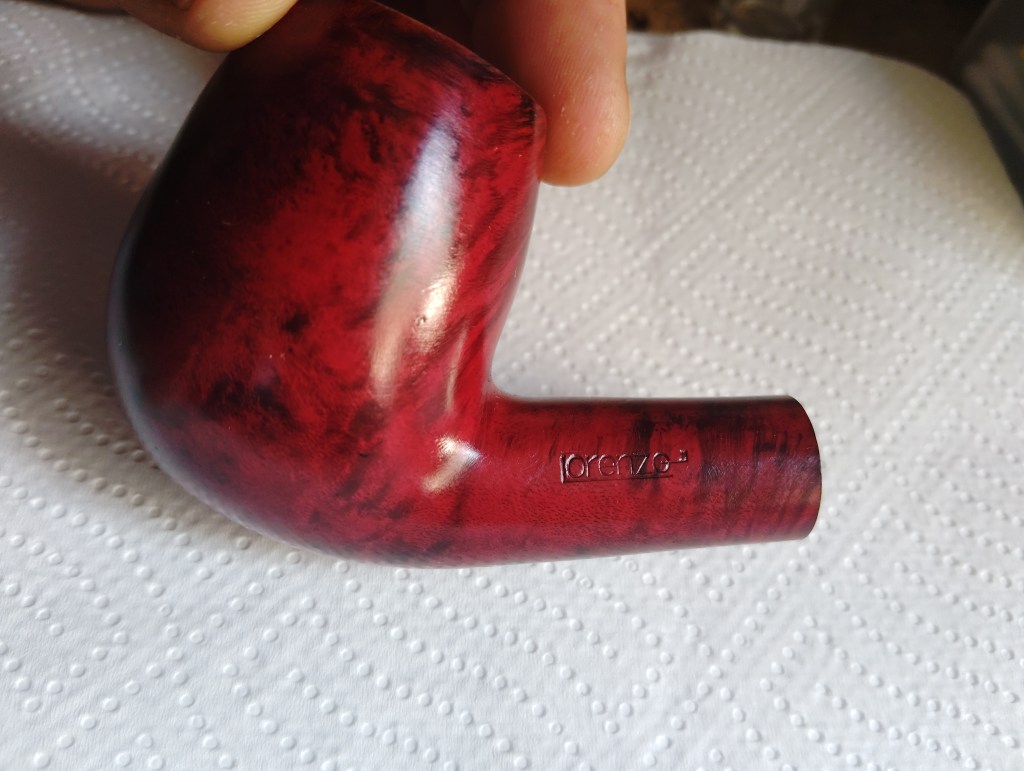
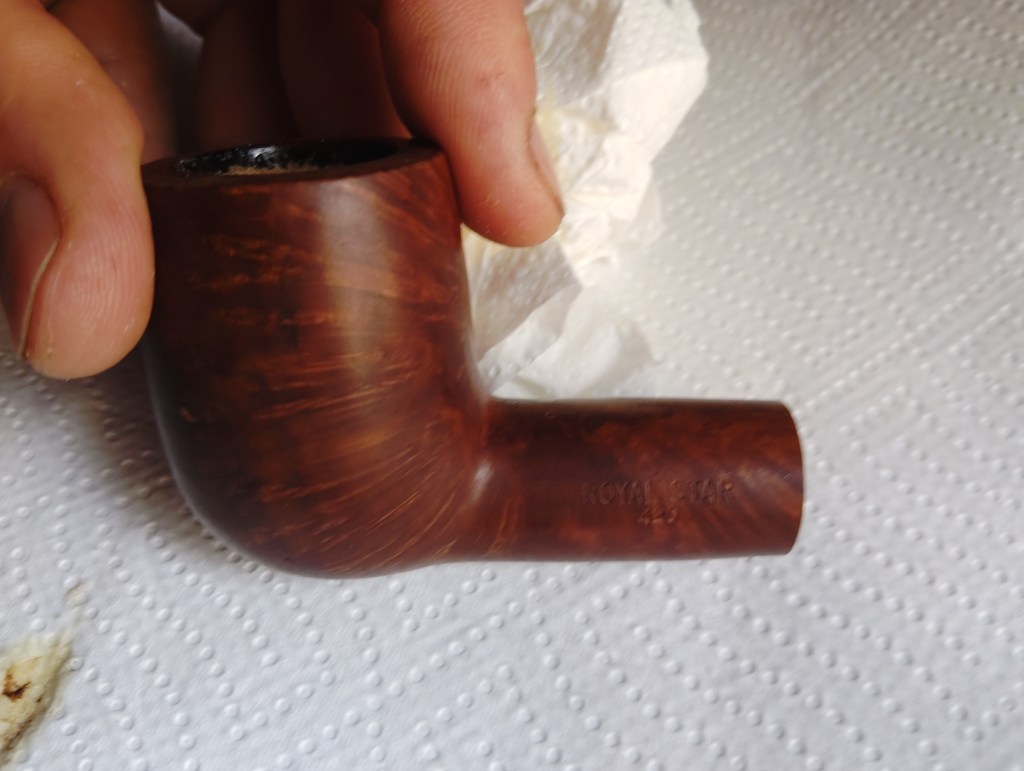
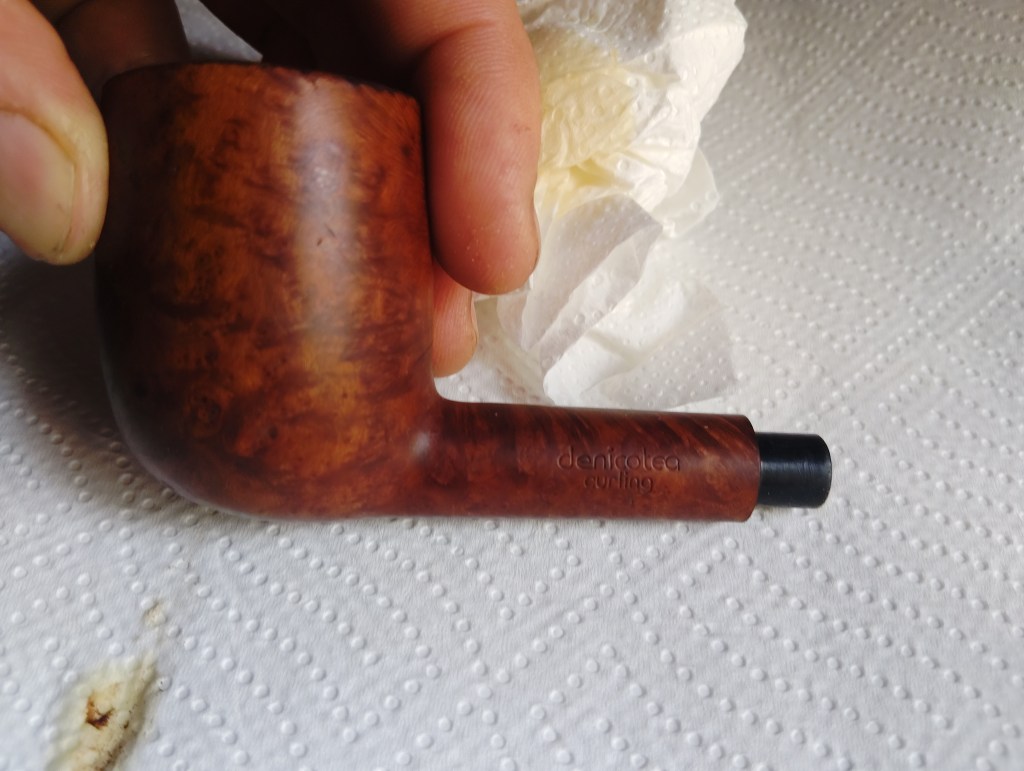
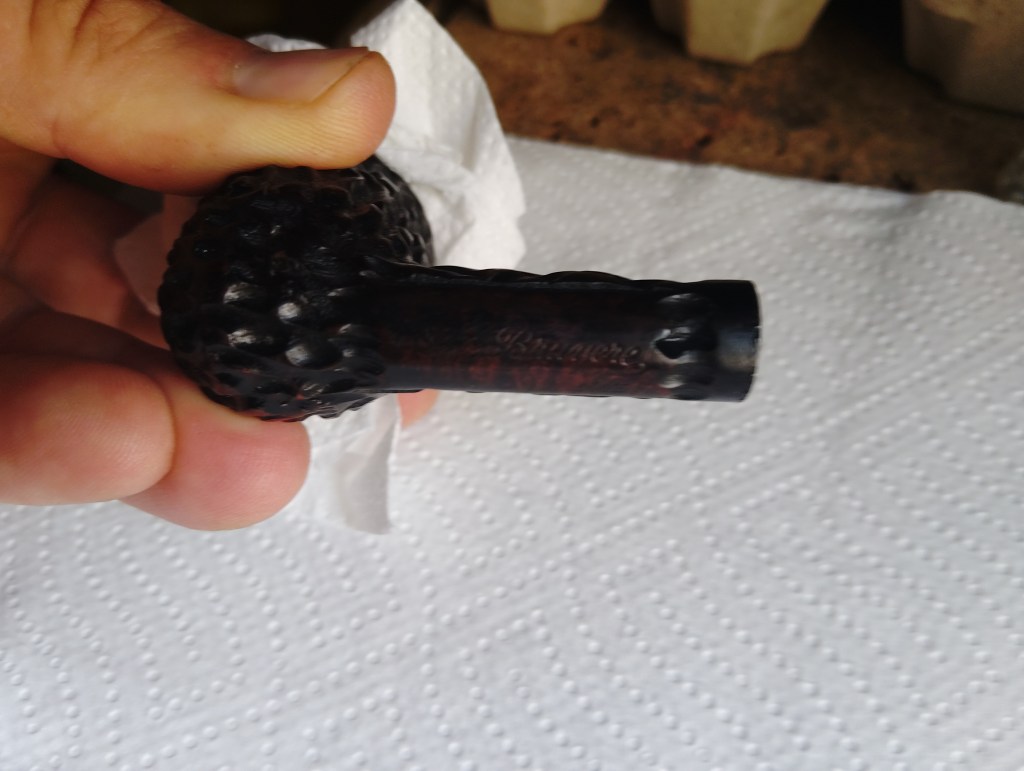
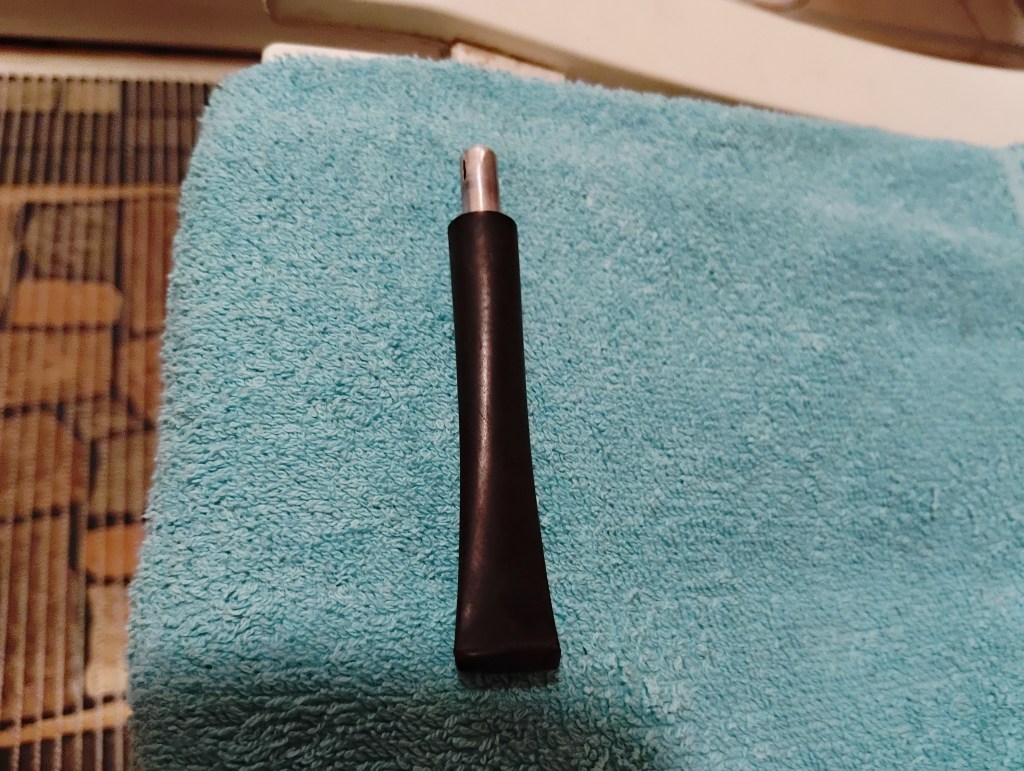
Figure 2. The pipes after disassembly. The Danish Design pipe is absent, as its condition required only basic cleaning and no restoration.
The First Cleaning
With the pipes taken apart, the restoration can finally begin.
The first task is removing the old cake from the chamber using reamers of different sizes. Each pipe had built up a different thickness of carbon, but fortunately none showed evidence of burnout or heat damage.
Only after the chamber has been cleaned is it possible to judge the true condition of the briar beneath.
The airways and shanks are then cleaned thoroughly with alcohol, removing years of accumulated tars and allowing the wood to reveal its actual condition.
First Impressions
The auction photographs had already given me some expectations, but several of the pipes proved even more interesting once they were cleaned.
Passatore
This was clearly the pipe that appeared to need the most work. Its heavy cake and worn exterior suggested a challenging restoration, yet beneath years of use the briar turned out to be remarkably well preserved.
Lorenzo
Once the dirt had been removed, the warm reddish finish became far more vibrant than the auction photographs had suggested.
Royal Star
Cleaning revealed attractive grain that had been almost invisible in the seller’s pictures.
Denicotea Curling
Besides its quality craftsmanship, this pipe featured an interesting removable stem adapter. The design makes maintenance considerably easier while offering a refreshing alternative to the more common stem-to-shank connection.
Rusticated Pipe (Maker Unknown)
Removing years of dirt revealed a beautifully textured rusticated finish—one of the reasons the pipe had originally caught my attention during the auction.
An additional surprise appeared during disassembly: the stem is fitted with an aluminium tenon, a feature seen less frequently on modern pipes. It provides a precise, secure fit while adding an interesting technical detail to an otherwise anonymous pipe.
Danish Design (Maker Unknown)
The biggest surprise was the Danish Design pipe. It turned out to be virtually unsmoked and required nothing more than a basic cleaning. Rather than joining the restoration process, it went straight onto the shelf to await its very first bowl of tobacco.
What Comes Next?
With the inspection complete, the actual restoration could begin.
The next stages included deep cleaning of the airways, further chamber preparation where necessary, removal of lingering tobacco odours using the salt-and-alcohol treatment, several days of drying, gradual restoration of the briar, and separate work on each stem.
In the next article, I will take a closer look at every stage of that process—from the salt-and-alcohol treatment and bowl coating to the final finishing touches that brought these estate pipes back to life.
More info about pipes and other products for their use you can get at: Mosir Smoking Pipes – Facebook & Instagram & Etsy.
Discover more from Ko pipa zadiši... / When you smell the pipe...
Subscribe to get the latest posts sent to your email.

