
Najpomembnejša faza, ki je na fotografijah skoraj ni mogoče zavohati.
Uvod
Ko je bilo začetno mehansko čiščenje zaključeno, je sledil eden najpomembnejših korakov celotne obnove. Čeprav so bile pipe na zunaj že precej lepše, je v notranjosti lesa še vedno ostalo veliko ostankov starih tobakov, katrana in vonjav, ki jih z običajnim čiščenjem ni mogoče odstraniti.
Prav zato pri obnovi starih pip vedno uporabim postopek čiščenja s soljo in alkoholom. Gre za preizkušeno metodo, ki omogoča globinsko čiščenje briarja brez agresivnih posegov v les.
Sol in alkohol
Po mehanskem čiščenju sem kurišča (bovle) napolnil z grobo kosher soljo, z njo pa zapolnil tudi dimne kanale in nastavke za ustnike.
V vsako bovlo sem nato previdno dolil alkohol, dokler ni enakomerno navlažil celotne soli. Posebno pozornost sem namenil temu, da alkohol ni prišel v stik z zunanjostjo pipe, saj lahko poškoduje zaščitni premaz oziroma razbarva originalni finiš briarja.
V naslednjih urah in dneh začne sol iz lesa vleči ostanke katrana, olj in drugih nečistoč, ki so se v briarju nabirali skozi leta kajenja. Ker alkohol sčasoma izhlapi, sem ga vsak dan sproti dolival. Tako je sol ves čas ostala prepojena z alkoholom, kar je omogočilo intenzivnejše in učinkovitejše globinsko čiščenje.
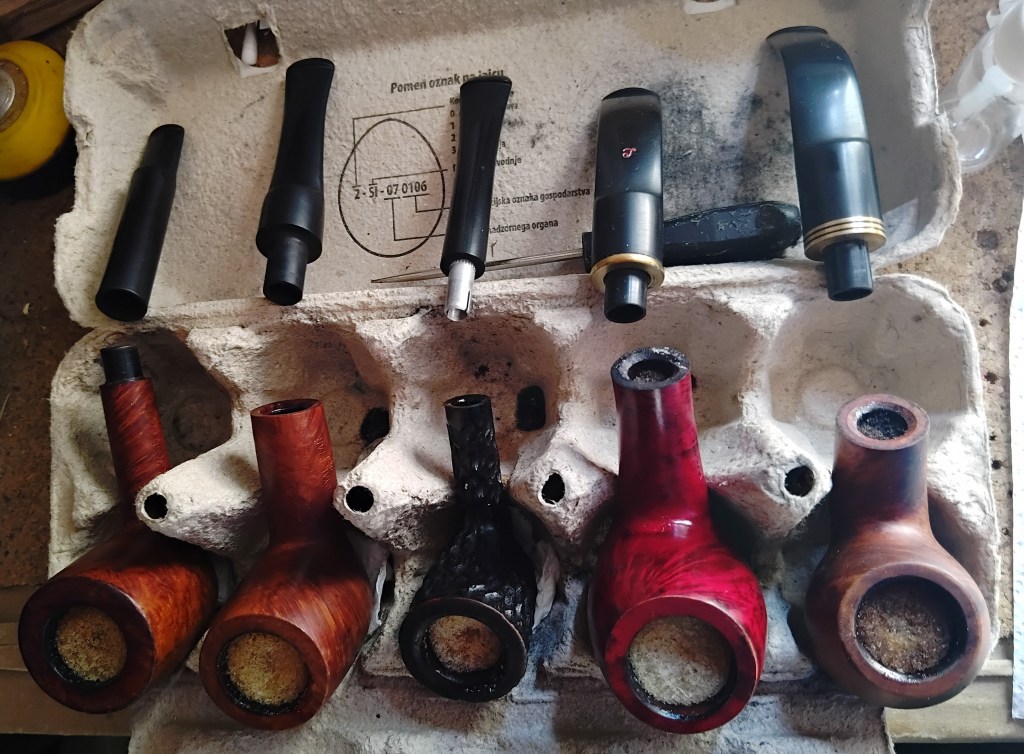
Slika 1. Pipe med postopkom čiščenja s soljo in alkoholom.
Več dni sušenja
Ko je sol po nekaj dneh opravila svojo nalogo, sem jo odstranil in pipe temeljito očistil.
S tem pa postopek še ni bil končan.
Alkohol mora iz lesa popolnoma izhlapeti, zato sem pipe pustil več dni na zračnem mestu, da se je briar popolnoma posušil. Ta korak pogosto zahteva največ potrpežljivosti, vendar ga ni smiselno prehitevati.
Le popolnoma suh les omogoča kakovostno nadaljnjo obnovo.
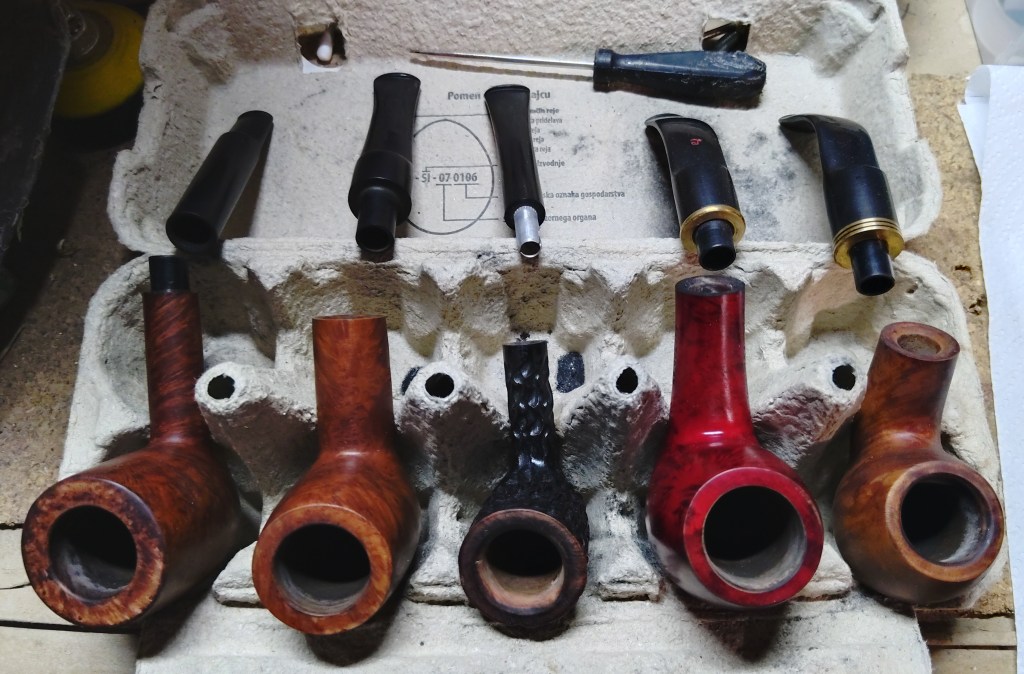
Slika 2. Pipe med večdnevnim sušenjem po odstranitvi soli.
Zaščitni sloj kurišča (Bowl Coating)
Ko so bile pipe po večdnevnem sušenju popolnoma suhe, je sledil še zadnji korak priprave kurišča.
V vsak dimni kanal sem najprej vstavil čistilno palčko za pipe, ki je preprečila, da bi premaz zašel v dimni kanal. Na notranjo površino kurišča sem nato nanesel tanek sloj javorjevega sirupa, zatem pa kurišče enakomerno prekril z aktivnim ogljem v prahu. Ker so bila nekatera kurišča precej velika, sem si pomagal s preprostimi vložki, s katerimi sem zmanjšal potrebno količino aktivnega oglja in olajšal enakomeren nanos premaza.
Namen tega premaza ni prikrivanje morebitnih poškodb lesa, temveč ustvarjanje tanke in enakomerne začetne zaščitne plasti. Na njej se med prvimi kajenji postopoma začne oblikovati nov zaščitni sloj oglja (cake), ki varuje briar pred neposrednim vplivom toplote.
Premaz mora biti tanek, enakomeren in popolnoma suh, preden je pipa pripravljena na prvo kajenje.
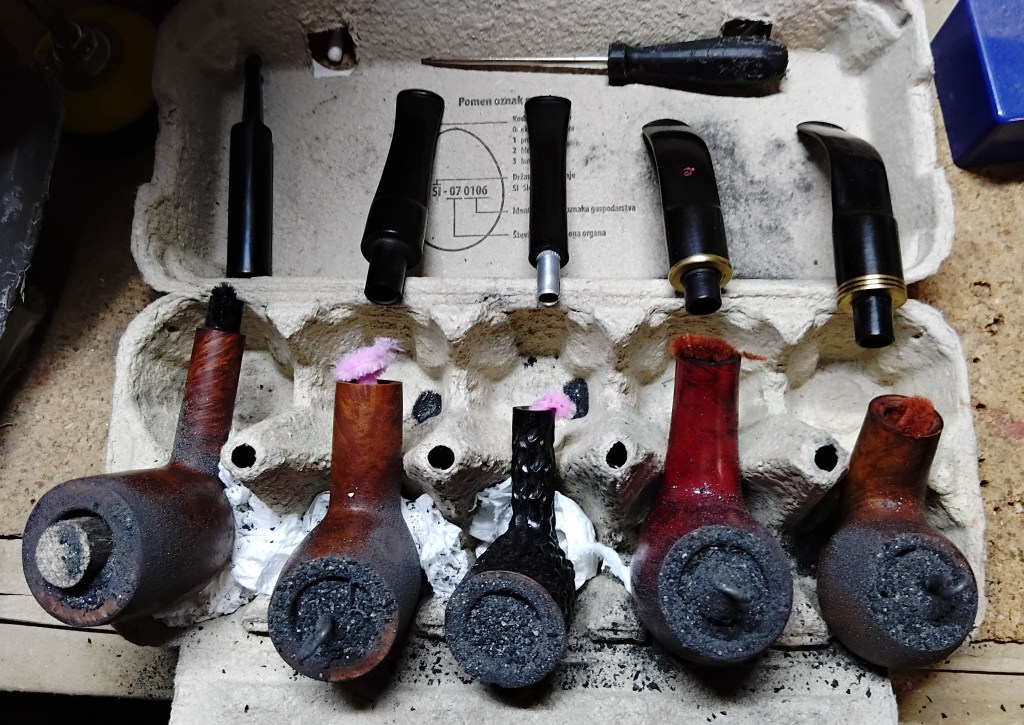
Slika 3. Nanos zaščitnega premaza kurišča (bowl coating).
Potrpežljivost je del obnove
Velik del restavriranja ni brušenje ali poliranje, temveč čakanje.
Čakanje, da alkohol opravi svoje delo.
Čakanje, da se briar popolnoma posuši.
In čakanje, da se zaščitni premaz pravilno strdi.
Prav ti koraki pogosto odločajo o tem, ali bo obnovljena pipa služila še desetletja ali pa se bodo težave pojavile že po prvih kajenjih.
Kaj sledi?
Ko je bilo notranje čiščenje zaključeno, se je lahko začelo delo, ki ga večina ljubiteljev pip opazi najprej – obnova zunanjosti.
V naslednjem delu bom predstavil obnovo briarja in ustnikov, ponovno oživitev barve lesa ter končno poliranje, ko so pipe po dolgem postopku ponovno dobile svoj pravi značaj.
Več informacij o pipah in dodatkih za njihovo uporabo je na Mosir Smoking Pipes: Facebook & Instagram & Etsy
🇬🇧 English version
From Auction to First Smoke – Part 3: The Most Important Stage You Can Hardly Smell in a Photograph
Deep cleaning the briar before bringing an estate pipe back to life.
Introduction
Once the initial mechanical cleaning was complete, it was time for one of the most important stages of the entire restoration process.
Although the pipes already looked much better on the outside, the inside of the briar still held years of tobacco residue, tars, oils and lingering aromas that cannot be removed by ordinary cleaning alone.
For this reason, I always use the traditional salt-and-alcohol treatment when restoring estate pipes. It is a well-proven method that deep-cleans the briar without the need for aggressive sanding or invasive repairs.
Salt and Alcohol
After the mechanical cleaning, I filled each tobacco chamber with coarse kosher salt. The airways and stem openings were also packed to ensure that every part of the smoking system could benefit from the treatment.
I then carefully added alcohol to each chamber until the salt was evenly saturated. Great care was taken to prevent the alcohol from coming into contact with the exterior of the pipe, as it can damage the finish or even strip the original stain from the briar.
Over the following hours and days, the salt gradually draws tars, oils and other impurities out of the wood—contaminants that have accumulated through years of smoking.
Because the alcohol slowly evaporates, I topped it up each day. Keeping the salt consistently moist allows the treatment to continue working throughout the entire process, resulting in a deeper and more effective cleaning.
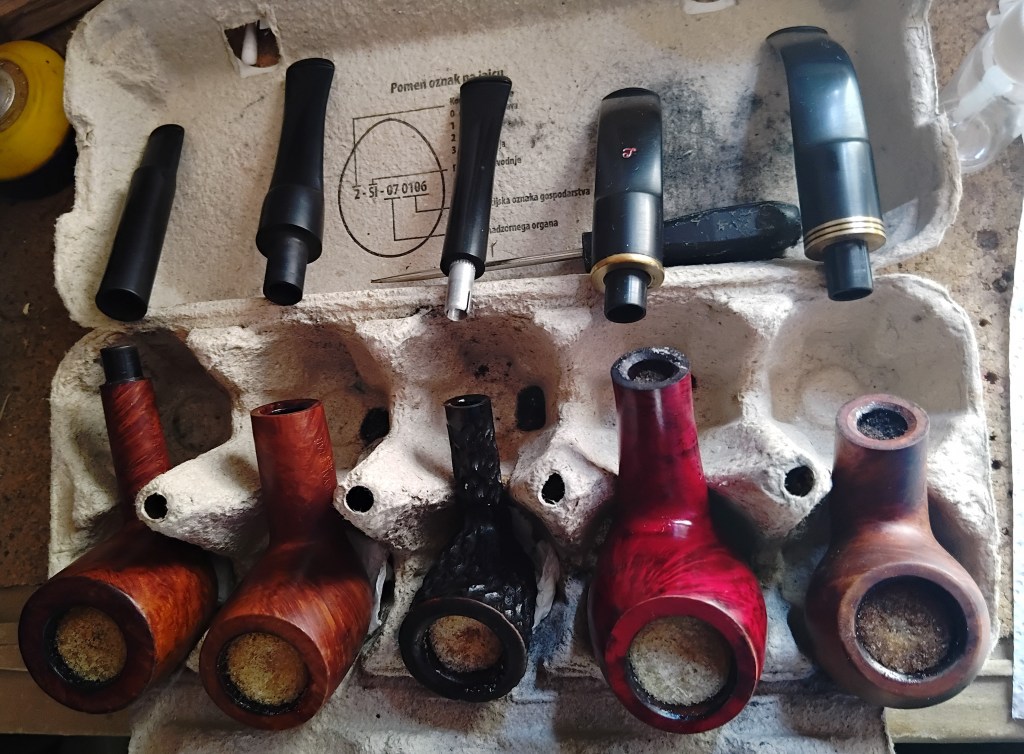
Figure 1. Pipes undergoing the salt-and-alcohol treatment.
Several Days of Drying
After several days, the salt had completed its task and was removed. Each pipe was then thoroughly cleaned once again.
At this point, however, the restoration was still far from finished.
Any remaining alcohol must be allowed to evaporate completely from the briar. For that reason, I left the pipes to dry naturally for several days in a well-ventilated place.
This stage probably requires more patience than any other part of the restoration, but it should never be rushed.
Only completely dry briar is ready for the next stages of restoration.
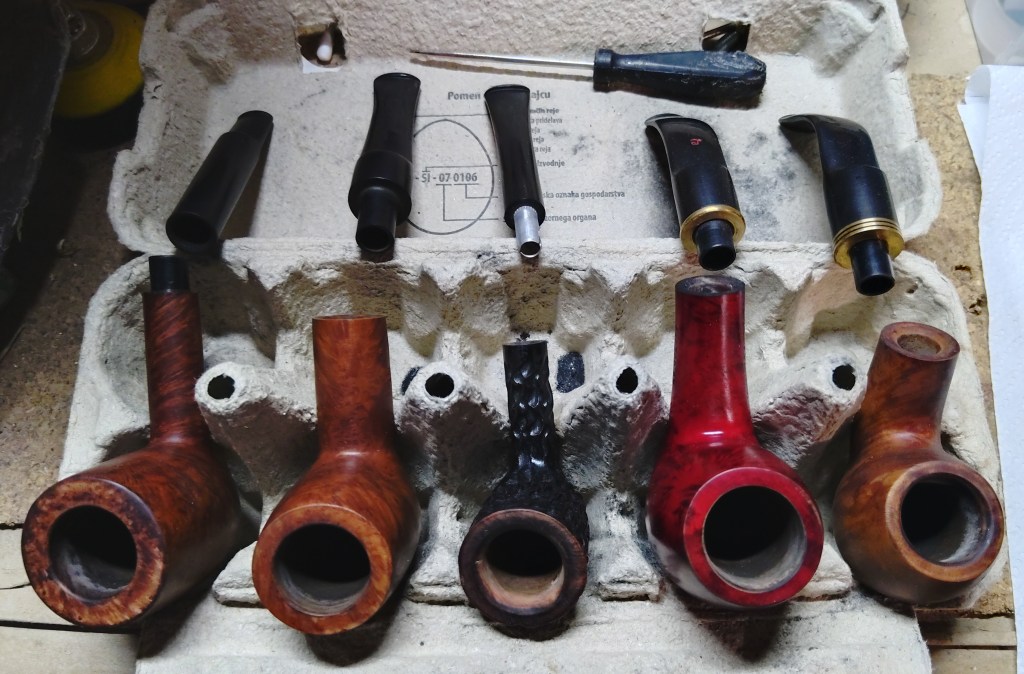
Figure 2. Pipes drying naturally after the salt-and-alcohol treatment.
Applying the Bowl Coating
Once the pipes had dried completely, it was time for the final preparation of the tobacco chamber.
Before applying the coating, I inserted a pipe cleaner into each airway to prevent the mixture from entering the draft hole. A thin layer of maple syrup was then brushed onto the chamber walls, followed by a coating of activated charcoal powder.
Some of the chambers were quite large, so I used simple inserts to reduce the amount of activated charcoal required while making it easier to achieve an even coating.
The purpose of this bowl coating is not to conceal imperfections in the briar. Instead, it creates a thin protective layer that encourages the formation of a new carbon cake during the first few smokes, helping to protect the chamber from direct heat.
The coating must remain thin, even and completely dry before the pipe is ready for its first smoke.
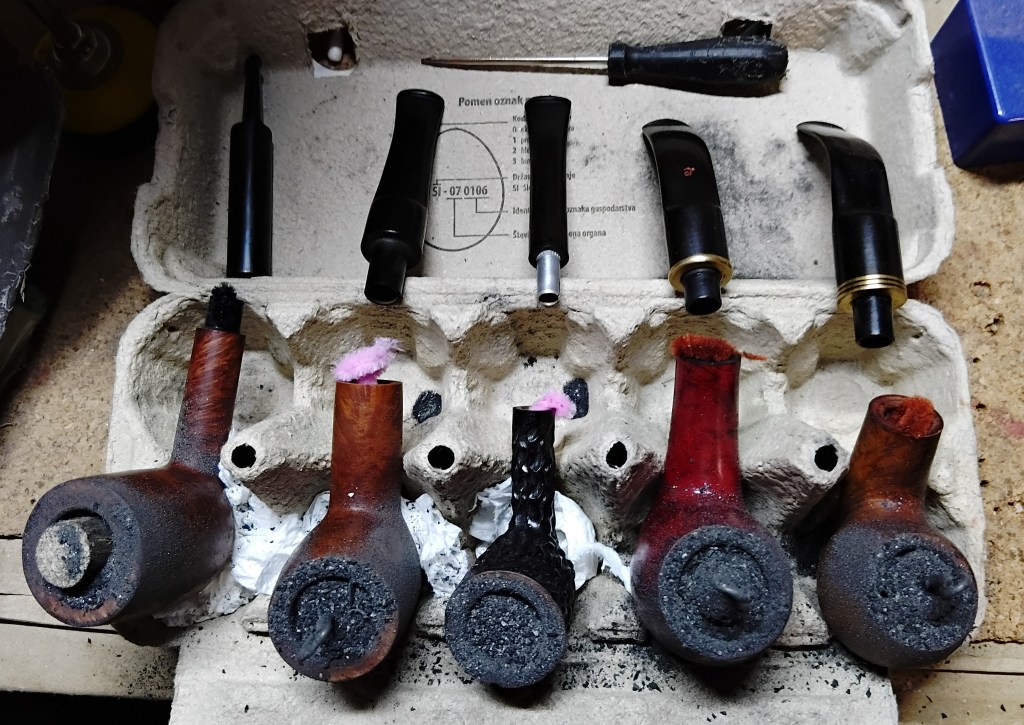
Figure 3. Applying the protective bowl coating.
Patience Is Part of the Restoration
A large part of pipe restoration is not sanding, polishing or buffing.
It is waiting.
Waiting for the alcohol to do its work.
Waiting for the briar to dry completely.
Waiting for the bowl coating to cure properly.
These quiet stages often determine whether a restored pipe will provide decades of reliable service or develop problems after only a few bowls.
What Comes Next?
With the internal restoration complete, attention could finally turn to the part that most pipe enthusiasts notice first—the exterior.
In the next article, I will cover the restoration of the briar and stems, the revival of the original finish, and the final polishing that brought these estate pipes back to their former character.
More info about pipes and other products for their use you can get at: Mosir Smoking Pipes – Facebook & Instagram & Etsy.
Discover more from Ko pipa zadiši... / When you smell the pipe...
Subscribe to get the latest posts sent to your email.

